Christmas Cookie Decorating for Beginners: Royal Icing and 15 Ideas
A beginner's guide to decorating Christmas cookies with royal icing, from the recipe and consistencies to 15 easy designs and storage.
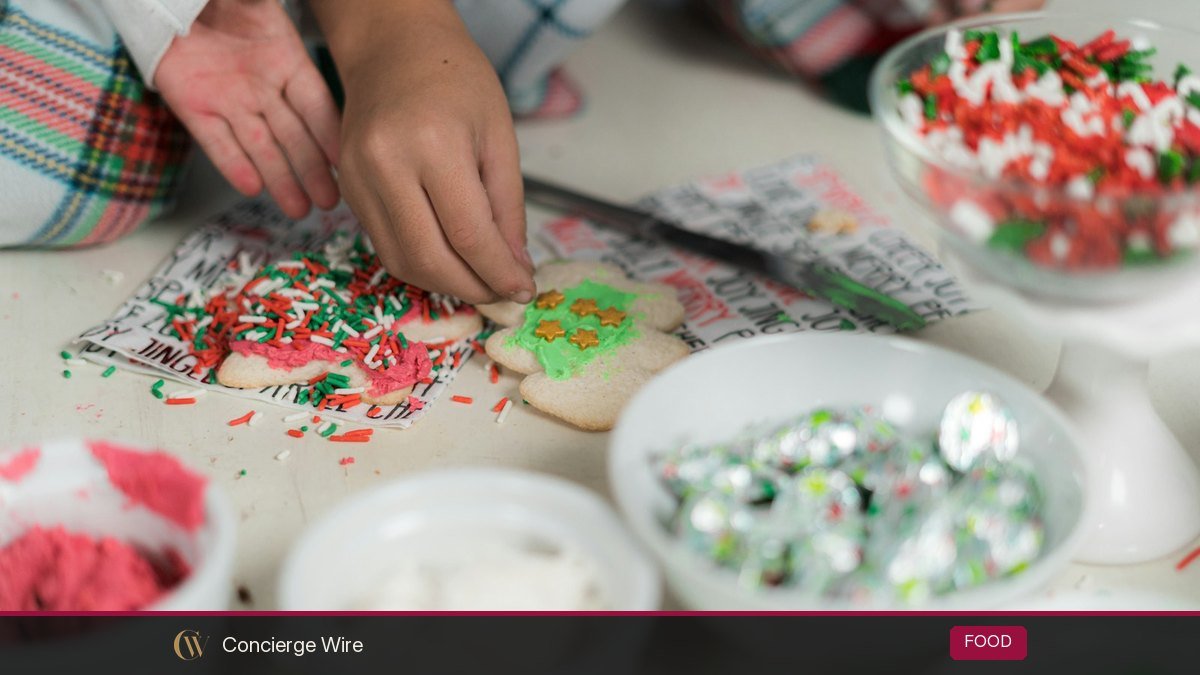
If you have never decorated a cookie with royal icing, you can still turn out a tray that looks bakery-made this December. This guide covers the icing recipe, the three consistencies you actually need, how flooding works, the tools worth buying, 15 beginner-friendly Christmas designs, and how long to dry and store everything so it survives a cookie swap.
Updated November 2026.
Key Takeaways
- Use meringue powder (or pasteurized egg whites) instead of raw egg whites, since the icing is never cooked.
- Make one stiff batch, then thin portions with water: stiff for details, medium for outlines, flood for filling.
- Test flood icing with the “count” method: a ribbon dragged through the bowl should disappear in roughly 10 to 15 seconds.
- Let flooded cookies dry overnight (8 to 12 hours) before stacking, bagging or shipping.
- Start with simple designs such as ornaments, sweaters and wet-on-wet snowflakes; they hide mistakes well.
Quick Answer: The Beginner Method in Five Steps
Short on time? Here is the whole process before we go into detail.
- Bake a no-spread cookie. A sugar cookie or gingerbread dough that holds sharp edges, rolled about 1/4 inch thick and chilled before baking.
- Make royal icing with powdered sugar, meringue powder and water, beaten until it holds stiff peaks.
- Divide and color the icing, then thin each color to the consistency you need.
- Outline and flood. Pipe a border, fill inside it with thinner icing, and pop air bubbles with a scribe or toothpick.
- Dry, then detail. Let the base crust over (about an hour) for raised details, or overnight before packing.
Start With the Right Cookie
Most decorating disasters start in the oven. A cookie that puffs and spreads leaves you with a domed surface where icing slides off the edge. Pick a recipe written for cut-outs, usually one with no baking powder or very little, and chill the cut shapes for 10 to 15 minutes before they go in the oven. Roll the dough between two sheets of parchment so you add no extra flour.
Bake until the edges are just set and barely golden. Over-baked cookies are fine to eat but crack when you press a piping tip against them. Let them cool completely, at least an hour, before any icing touches them. Warm cookies melt royal icing and leave blotchy, uneven color.
Cookie shapes that are easiest for beginners
- Round (ornaments, wreaths, snow globes)
- Plaque or rectangle (sweaters, presents, gift tags)
- Simple tree with a flat trunk
- Mitten
- Star (slightly harder because of the points)
Avoid very thin, spiky shapes such as reindeer with antlers for your first batch. They break, and flooding the narrow parts takes practice.
Royal Icing: A Reliable Starting Recipe
Royal icing is sugar, a protein that helps it set hard, and water. Traditional recipes use raw egg whites, but the icing is never cooked. The U.S. Food and Drug Administration advises using pasteurized egg products or treated shell eggs for any recipe where eggs stay raw, because even clean, uncracked eggs can carry Salmonella. Meringue powder solves this, keeps well in the pantry, and gives consistent results, so it is what most home decorators use.
Ingredients (decorates roughly 2 to 3 dozen 3-inch cookies)
- 4 cups (about 1 lb) powdered sugar, sifted
- 3 tablespoons meringue powder
- 5 to 6 tablespoons lukewarm water, plus more for thinning
- 1/2 teaspoon clear vanilla or almond extract (optional; clear keeps white icing white)
Method
- Whisk the sugar and meringue powder together in a stand mixer bowl.
- Add 5 tablespoons of water and the extract. Mix on low until combined, then beat on medium-low for 4 to 5 minutes until glossy and the icing holds a stiff peak.
- Scrape into a container, press plastic wrap directly onto the surface, and close the lid. Royal icing crusts within minutes when exposed to air.
Brands differ, so treat these amounts as a starting point and follow the ratio printed on your meringue powder if it is different. Keep every tool free of grease. Even a trace of butter in the bowl stops royal icing from setting properly.
The Three Consistencies, Explained
Professional decorators talk about “10-second” or “15-second” icing. The number is how long a line dragged through the surface with a knife takes to vanish. You do not need a dozen versions. Three cover nearly every Christmas design.
| Consistency | What it looks like | Count test | Use it for |
|---|---|---|---|
| Stiff | Holds a peak that does not bend | Line never closes | Rosettes, holly leaves, gluing pieces, lettering that stands up |
| Medium (outline/piping) | Like toothpaste; peak curls over | About 20 to 25 seconds | Borders, sweater stitches, ornament caps, writing |
| Flood | Like thick shampoo or honey | About 10 to 15 seconds | Filling large areas for a smooth surface |
Many beginners now use a single “20-second” icing for both outlining and flooding. It is thick enough to hold an edge and thin enough to spread with a nudge from a scribe tool. If you are decorating with kids or only making one color, try this first.
How to thin without overshooting
Add water a few drops at a time with a spray bottle or a 1/4 teaspoon measure, stir gently with a spatula (not a whisk, which adds bubbles) and test again. If you go too thin, stir in a spoonful of the stiff icing you held back. Always keep a little stiff icing in reserve for this reason.
Coloring royal icing
Use gel food coloring, not liquid drops from the supermarket. Liquid color adds water and throws off your consistency, and you need a lot of it to get anything deeper than pastel. A toothpick dipped in gel goes a long way.
- Red and dark green deepen as they sit. Mix them a few hours ahead, or the night before, and they will darken by one or two shades.
- Make more than you think. Matching a color in a second batch is close to impossible.
- Classic Christmas palette: bright white, a true red, a forest green, a soft gold or yellow, and a pale blue for snow scenes.
- Bleeding: dark colors next to white can bleed in humid kitchens. Let the white crust for an hour before you add red beside it.
Tools: What You Need and What Can Wait
You can decorate with a zip-top bag and a toothpick. A few inexpensive tools make it easier.
| Tool | Must-have? | Why |
|---|---|---|
| Disposable piping bags (12-inch) | Yes | One per color; easier to control than zip-top bags |
| Small round tips (#1, #2, #3) | Helpful | Clean lines; or simply snip a tiny hole in a tipless bag |
| Scribe tool or toothpicks | Yes | Pushes icing into corners and pops bubbles |
| Squeeze bottles | Nice to have | Easy flooding for kids |
| Gel food colors | Yes | Deep color without thinning the icing |
| Small fan | Nice to have | Speeds drying and gives a shinier surface |
| Cookie turntable | Can wait | Helpful once you decorate in volume |
| Sprinkles, sanding sugar, edible pearls | Fun extra | Hides small mistakes and adds texture |
Fill bags no more than halfway, twist the top and secure it with a clip or rubber band. Stand filled bags tip-down in a tall glass with a damp paper towel in the bottom so the tips do not dry out.
How to Outline and Flood, Step by Step
- Hold the bag at a 45-degree angle with the tip slightly above the cookie. Squeeze gently and let the line fall onto the surface rather than dragging the tip.
- Outline about 1/8 inch inside the edge of the cookie. This leaves a neat border and keeps icing from running off.
- Flood within a few minutes, before the outline crusts. Start at the edges and zigzag toward the middle.
- Use a scribe to push icing into corners and drag it in small circles to level the surface.
- Pop bubbles immediately. Tap the cookie on the table and burst any bubbles with the scribe point.
- Add wet-on-wet designs now (see below) or set the cookie aside to dry.
Wet-on-wet versus wet-on-dry
Wet-on-wet means piping a second color into the flood while it is still wet. The dots and lines sink in and dry flat. It is the fastest way to get polished patterns like polka dots, hearts and marbling. Wet-on-dry means letting the base crust (about 1 hour) or fully dry before piping on top, which gives raised, dimensional details like sweater stitches and holly berries.
15 Christmas Cookie Decorating Ideas for Beginners
These are ordered roughly from easiest to slightly more involved. None need special equipment beyond bags, a scribe and sprinkles.
Ornaments and trees
- Polka-dot ornament. Flood a round cookie red, immediately pipe white dots wet-on-wet, then add a small gray or gold rectangle cap once dry.
- Striped ornament. Flood white, pipe three horizontal red or green lines wet-on-wet, and leave as is or drag a toothpick up and down for a chevron effect.
- Marbled ornament. Flood in one color, drop two other colors in random dots, then swirl once with a toothpick. Do not over-swirl or it turns muddy.
- Simple green tree. Flood green, then pipe a garland zigzag in white after an hour and add sprinkle “lights” while the garland is wet.
- Sprinkle tree. Flood green and immediately cover with green sanding sugar. Shake off the excess. Almost foolproof.
Sweaters, mittens and gifts
- Ugly sweater. Flood a plaque or sweater shape, let it crust, then pipe stripes, snowflakes and “knit” V-stitches with medium icing.
- Mitten with cuff. Flood the mitten red, let it crust, then pipe a thick white cuff with stiff icing and texture it with a toothpick to look like fur.
- Wrapped present. Flood a square, let it dry, then pipe a cross ribbon and a bow made of two loops.
- Gift tag. Flood a rectangle white and, once dry, pipe a name. These double as place cards.
Snow and winter scenes
- Wet-on-wet snowflake. Flood pale blue, pipe a white dot in the center and six white lines outward, then drag a toothpick from the tip of each line toward the center.
- Piped snowflake on a dark base. On a dry navy flood, pipe white lines and dots wet-on-dry. Add edible pearls at the tips.
- Snowman face. Flood a round white, then add two black dots for eyes, an orange carrot nose and a dotted smile after an hour.
- Snow globe. Flood a round pale blue, add a small tree at the bottom and white dots for falling snow.
Festive favorites
- Candy cane. Flood white, let dry, then pipe diagonal red stripes. Use a candy cane cutter or a simple “J” shape.
- Holly wreath. Flood a round green ring, let it crust, and pipe clusters of three red dots for berries plus small leaf shapes with a leaf tip or a V-cut bag.
Want a theme for a cookie swap? Choose one palette (say, red, white and gold) and make three designs in it. A tray of matching colors looks far more professional than fifteen different ideas.
Drying, Troubleshooting and Storage
Royal icing dries from the outside in. The surface firms within an hour, but the inside can stay soft for many hours, especially in a humid kitchen.
| Stage | Typical time | What you can do |
|---|---|---|
| Crusted surface | About 1 hour | Pipe raised details on top |
| Dry to the touch | 4 to 6 hours | Move gently; do not stack |
| Fully dry | 8 to 12 hours (overnight) | Stack, heat-seal in bags, box or ship |
Times vary with icing thickness and humidity, so treat them as a guide. A small fan blowing across the cookies for the first hour helps a lot.
Common problems and fixes
- Craters (little sinkholes) in small areas: icing too thin. Use slightly thicker flood for tiny sections, and dry under a fan.
- Icing will not set: grease in the bowl or too much water. Start a fresh batch with clean tools.
- Colors bleeding: let one color crust before adding the next and avoid very humid rooms.
- Blotchy spots (butter bleed): butter from the cookie seeping in. Decorate fully cooled cookies and let them sit a day before decorating if this keeps happening.
- Tip clogs: a lump of dried sugar. Sift the powdered sugar and keep tips covered between uses.
Storing, packing and making ahead
Decorated sugar cookies keep well because the hard icing seals the top. Once fully dry, store them in a single layer or between sheets of parchment in an airtight container at room temperature. Most decorators say they taste best within about a week, though they stay safe and attractive longer if kept dry. Do not refrigerate decorated cookies: condensation makes colors run.
For planning ahead, there are two good options:
- Freeze undecorated cookies in airtight containers for several weeks, then thaw at room temperature before decorating.
- Freeze decorated cookies that are fully dry, sealed individually and packed snugly. Thaw them inside the closed container so condensation forms on the box, not the icing.
Leftover royal icing can sit covered at room temperature for a day or two if made with meringue powder. Re-beat it briefly before using. For gifting or a cookie exchange, heat-sealed cellophane bags keep each cookie fresh and stop flavors (like peppermint) from transferring.
A simple decorating day plan
Trying to bake and decorate in one afternoon is how people burn out. Split it up.
- Day 1 (evening): make dough, chill, roll, cut, bake and cool. Mix red and green icing so the colors deepen overnight.
- Day 2 (afternoon): outline and flood base colors and wet-on-wet designs. Dry under a fan.
- Day 2 (evening): add raised details on cookies that have crusted.
- Day 3: bag, box and share.
Decorating with children? Give them pre-flooded cookies and squeeze bottles of medium icing plus sprinkles. They get the fun part, and you skip the cleanup of flood icing on every surface.
Frequently Asked Questions
Can I use buttercream instead of royal icing?
Yes, but it stays soft. Buttercream suits rustic, swirled designs and tastes richer, while royal icing dries hard and smooth, which is better for stacking, gifting and sharp details.
Is royal icing safe if it contains egg whites?
Raw egg whites carry a small Salmonella risk because the icing is not cooked. Use meringue powder or pasteurized egg whites, which is what the FDA recommends for recipes where eggs stay raw.
How far ahead can I decorate Christmas cookies?
Decorated, fully dried cookies stored airtight at room temperature are usually at their best for about a week. For longer, freeze them sealed and thaw them in the closed container.
Why is my royal icing shiny on some cookies and dull on others?
Fast drying gives more shine. Cookies dried under a fan or in a warm, dry room tend to look glossier than those left in a cool, humid kitchen.
How do I get a deep red without a bitter taste?
Use a “no-taste” red gel, mix it hours ahead so it darkens on its own, and start from pink-tinted icing rather than pure white so you need less coloring.
Do I need a stand mixer?
No. A hand mixer works; it just takes a few minutes longer to reach stiff peaks. Mixing by hand is possible for a small batch but tiring.
Your First Tray This Week
Pick three designs from the list, make one batch of icing in two or three colors, and give yourself two days. The first dozen will teach you more about consistency than any guide, and by the second dozen your outlines will be noticeably cleaner. Keep the imperfect ones for yourself and gift the rest.