Easy Fall Apple Desserts: Crisp, Crumble, Hand Pies and Baked Apples
Six easy fall apple desserts, from a 15-minute apple crisp to hand pies, with a variety table showing which apples hold up best in the oven.
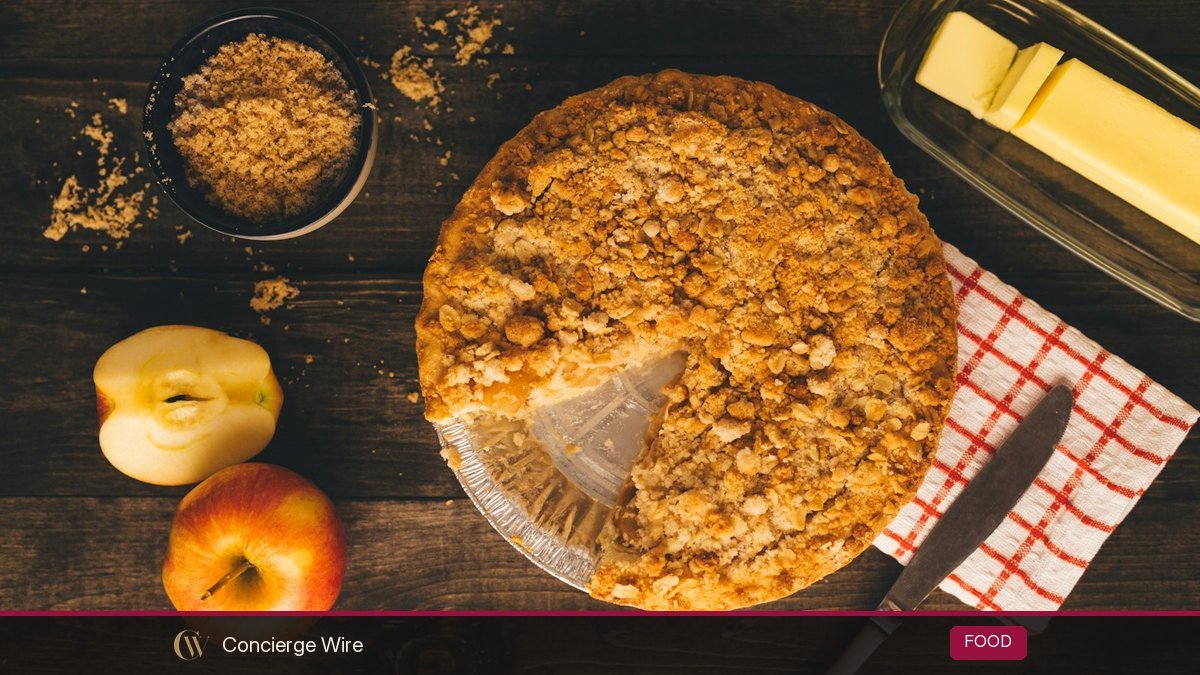
The easiest fall apple desserts are apple crisp, apple crumble, baked apples, hand pies made with store-bought crust, and a no-fuss apple galette. All five need ordinary pantry ingredients and under 20 minutes of hands-on time. Below you get the recipes with oven temperatures and times, a table of the best apples for baking, and fixes for watery or mushy results. Updated October 2026.
Key Takeaways
- For the least work, make an apple crisp: slice apples, toss with sugar and cinnamon, cover with an oat topping and bake at 350°F for about 45 minutes.
- Use firm apples that hold their shape, such as Granny Smith, Honeycrisp, Braeburn or Pink Lady. Save soft McIntosh for sauce, or mix it in for texture.
- A blend of one tart and one sweet variety gives the best flavor in almost every recipe.
- A tablespoon or two of flour or cornstarch in the filling prevents a soupy dessert.
- Crisp and crumble toppings freeze well raw, so you can prep once and bake twice.
Quick answer: which apple dessert should you make?
| Dessert | Hands-on time | Bake | Skill level | Best for |
|---|---|---|---|---|
| Apple crisp | 15 min | 350°F, 40 to 50 min | Beginner | Weeknights, potlucks, crowds |
| Apple crumble | 15 min | 375°F, 35 to 45 min | Beginner | Buttery, shortbread-style topping fans |
| Baked apples | 10 min | 375°F, 35 to 50 min | Beginner | Small households, lighter dessert |
| Apple hand pies | 25 min | 400°F, 18 to 22 min | Easy | Lunchboxes, parties, gifting |
| Rustic apple galette | 20 min | 400°F, 35 to 45 min | Easy | Pie taste without a pie dish |
| Skillet cinnamon apples | 15 min | Stovetop, 10 to 12 min | Beginner | Topping for ice cream, oatmeal or pancakes |
Times are guides. Ovens vary, so start checking five to ten minutes before the end of the range.
Best apples for baking: variety table
The US grows more than 100 apple varieties, according to the US Apple Association, but you will usually find a dozen or so in a supermarket in October. What matters for desserts is whether the apple keeps its shape in the oven and how tart it is.
| Variety | Flavor | Texture after baking | Best dessert use |
|---|---|---|---|
| Granny Smith | Very tart | Holds shape well | Crisp, galette, pie; mix with a sweeter apple |
| Honeycrisp | Sweet-tart, juicy | Mostly holds shape, releases juice | Crisp, crumble, hand pies (add thickener) |
| Braeburn | Tart-sweet, spicy | Firm | Galette, pie, baked apples |
| Pink Lady (Cripps Pink) | Tart then sweet | Firm | Galette, hand pies, tarts |
| Jonagold | Sweet with some tang | Fairly firm | Crisp, pie, baked apples |
| Golden Delicious | Mild, sweet | Softens but stays in pieces | Crisp blends, hand pies |
| Northern Spy | Tart, aromatic | Firm | Classic pie apple, often in regional orchards |
| Gala | Sweet, mild | Softens | Skillet apples, kids’ snacks; blend for baking |
| Fuji | Very sweet | Holds shape moderately | Baked apples, skillet apples |
| McIntosh | Tangy, aromatic | Breaks down quickly | Applesauce; a few in a crisp for saucy texture |
| Red Delicious | Mild, sweet | Mealy when baked | Eat fresh; skip for baking |
Extension services list similar uses. Utah State University Extension’s apple variety list, for example, rates Red Delicious poor for baking and lists Northern Spy and Idared for pies.
Rule of thumb: combine one tart, firm apple (Granny Smith or Braeburn) with one sweeter apple (Honeycrisp, Jonagold or Golden Delicious). You get structure from the first and flavor from the second.
How many apples? A medium apple weighs roughly a third of a pound. A 9×13 crisp takes about 3 pounds (8 to 9 medium apples). An 8×8 pan takes about half that.
Six easy apple dessert recipes
Each recipe below uses everyday ingredients. Start with the crisp if you are new to baking; it teaches you how apples, sugar and heat behave, and every other recipe builds on that.
1. Easy apple crisp (the one to make first)
If you only learn one apple dessert, make this one. It is forgiving, scales up easily and needs no special equipment.
Ingredients (8×8 pan, serves 6):
- 5 medium apples, peeled or unpeeled, sliced about 1/4 inch thick
- 2 tablespoons granulated sugar and 1 teaspoon cinnamon
- 1 tablespoon all-purpose flour and 1 tablespoon lemon juice
- Topping: 3/4 cup old-fashioned oats, 1/2 cup flour, 1/2 cup brown sugar, 1/2 teaspoon cinnamon, a pinch of salt, 6 tablespoons cold butter cut into cubes
Method:
- Heat the oven to 350°F and butter the pan.
- Toss the apples with sugar, cinnamon, flour and lemon juice. Spread in the pan.
- Mix the dry topping ingredients, then rub in the butter with your fingers until it forms clumps.
- Scatter the topping evenly over the apples.
- Bake 40 to 50 minutes, until the topping is deep golden and the juices bubble around the edges.
- Rest 15 minutes so the juices thicken. Serve warm with vanilla ice cream.
Variations: add 1/2 cup chopped pecans to the topping, swap a cup of the apples for cranberries, or use half pears.
2. Apple crumble (no oats)
In the US the names get used loosely, but a crumble usually skips the oats and has a richer, more shortbread-like topping. It is the British version of the dish.
- Filling: the same as the crisp, or add a pinch of nutmeg and a tablespoon of brown sugar.
- Topping: 1 cup flour, 1/2 cup sugar (half white, half brown), a pinch of salt and 7 tablespoons cold butter, rubbed together until it looks like coarse sand with some pea-sized lumps.
- Bake: 375°F for 35 to 45 minutes.
Squeeze a handful of topping in your fist before you scatter it. The bigger clumps bake into crunchy nuggets instead of a flat crust.
3. Baked apples
Baked apples are the lowest-effort dessert here, and you can make one or ten.
- Heat the oven to 375°F. Choose firm apples such as Braeburn, Honeycrisp or Jonagold.
- Core each apple with a melon baller or small spoon, leaving the bottom intact so the filling stays put.
- Mix 2 tablespoons brown sugar, 1 tablespoon chopped walnuts or oats, 1 tablespoon raisins, 1/2 teaspoon cinnamon and 1 teaspoon butter per apple. Pack it into the cavity.
- Stand the apples in a baking dish and pour about 1/2 inch of water or apple cider around them.
- Bake 35 to 50 minutes, until a knife slides in easily. Spoon the pan juices over the top.
Score a thin line around the middle of each apple before baking. It stops the skin from splitting as the apple expands.
4. Apple hand pies with store-bought crust
Hand pies feel special but use a shortcut: refrigerated pie crust.
Filling: Dice 3 apples small (about 1/4 inch). Cook in a skillet with 2 tablespoons butter, 3 tablespoons brown sugar and 1 teaspoon cinnamon for 5 to 7 minutes until just tender. Stir in 1 teaspoon cornstarch mixed with 1 tablespoon water and cook one more minute until glossy. Cool completely. Warm filling melts the pastry.
Assembly:
- Heat the oven to 400°F and line a sheet pan with parchment.
- Unroll two crusts and cut 4 to 5-inch circles (a cereal bowl works as a guide).
- Put a heaping tablespoon of filling on one half of each circle. Do not overfill.
- Fold over, press the edges with a fork, and cut a small slit on top.
- Brush with beaten egg and sprinkle with coarse sugar.
- Bake 18 to 22 minutes until golden. Cool on a rack.
Make them ahead by freezing the unbaked, shaped pies on a tray, then bagging them. Bake from frozen and add a few minutes.
5. Rustic apple galette
A galette is a free-form pie baked flat on a sheet pan. Cracks and uneven edges are part of the look, which makes it ideal for nervous pie bakers.
- Roll one pie crust into a 12-inch circle on parchment.
- Toss 3 thinly sliced firm apples with 3 tablespoons sugar, 1 tablespoon flour, 1/2 teaspoon cinnamon and a squeeze of lemon.
- Arrange the slices in the center, leaving a 2-inch border.
- Fold the border up over the fruit in pleats. Brush the crust with egg and sprinkle with sugar.
- Bake at 400°F for 35 to 45 minutes, until the crust is deep golden and the fruit is tender.
- Brush the warm apples with a tablespoon of warmed apricot jam for shine.
6. Ten-minute skillet cinnamon apples
Melt 2 tablespoons butter in a skillet, add 3 sliced apples, 2 to 3 tablespoons brown sugar, 1/2 teaspoon cinnamon and a pinch of salt. Cook over medium heat for 10 to 12 minutes, stirring, until tender and glazed. Spoon over ice cream, waffles, yogurt or oatmeal. This is also a good use for softer apples that would turn mushy in a crisp.
Troubleshooting: fixes for common apple dessert problems
| Problem | Likely cause | Fix next time |
|---|---|---|
| Soupy, watery filling | Juicy apples, no thickener | Add 1 to 2 tablespoons flour or 2 teaspoons cornstarch; let it rest 15 minutes after baking |
| Mushy apples | Soft variety or slices too thin | Use firm apples and cut 1/4-inch slices |
| Hard, undercooked apples | Slices too thick, oven too cool | Slice evenly; test with a knife before pulling |
| Pale, soft topping | Butter too warm, pan crowded | Use cold butter; bake on the middle rack until deep golden |
| Burnt topping, raw fruit | Oven runs hot | Tent loosely with foil for the last 15 minutes |
| Browned apples before baking | Cut fruit sitting out | Toss slices with lemon juice as you go |
Easy upgrades and serving ideas
Small additions make a weeknight crisp feel like a holiday dessert without extra work.
- Salted caramel: drizzle store-bought caramel sauce over warm crisp and finish with a pinch of flaky salt.
- Spice blend: swap plain cinnamon for apple pie spice, or add a pinch of cardamom or ground ginger.
- Cheddar crust: in some parts of New England, apple pie is served with sharp cheddar. Try a few slices alongside a galette.
- Toppings: vanilla ice cream, whipped cream, Greek yogurt with honey, or a splash of heavy cream.
- Breakfast leftovers: spoon cold crisp over plain yogurt for a quick next-morning parfait.
Make-ahead, storage and freezing
- Crisp and crumble topping: mix it, bag it raw and freeze for up to about three months. Sprinkle it straight from the freezer onto fresh apples.
- Baked crisp: cover and refrigerate leftovers once cool. Reheat portions in a 350°F oven for 10 to 15 minutes to re-crisp the top. The microwave makes the topping soft.
- Hand pies: freeze unbaked, as above.
- Whole apples: keep them in the refrigerator crisper drawer rather than a fruit bowl if you will not bake for a week or more. They stay firmer.
As with any cooked dessert, do not leave leftovers out on the counter for long, and refrigerate them once they are cool.
Frequently Asked Questions
What is the easiest apple dessert for beginners?
Apple crisp. You slice apples, toss them with sugar and cinnamon, cover with an oat and butter topping, and bake at 350°F for 40 to 50 minutes. There is no crust to roll and very little that can go wrong.
What is the difference between apple crisp and apple crumble?
In the US the terms overlap, but a crisp usually has oats (and sometimes nuts) in the topping, while a crumble is a plain flour, butter and sugar topping that bakes up more like shortbread.
Which apples should I not use for baking?
Red Delicious turns mealy and bland in the oven. McIntosh breaks down quickly, which is great for applesauce but makes a mushy crisp unless you mix it with a firmer apple.
Do I need to peel apples for a crisp?
No. Thin-skinned varieties such as Honeycrisp and Golden Delicious are fine unpeeled and add color. Peel thicker-skinned apples such as Granny Smith if you prefer a smoother texture.
Can I make apple desserts with less sugar?
Yes. Sweet apples like Fuji or Honeycrisp need little or no sugar in the filling. Keep some sugar in the topping, though, because it helps it brown and crisp.
How do I keep a crisp from getting soggy the next day?
Store it in the refrigerator uncovered for the first hour so steam escapes, then cover it. Reheat in the oven, not the microwave.
Pick one and start this weekend
Fall is the best time of year for this. Apples are at their freshest and cheapest from orchards and farm stands, and every recipe here works with what you find there. Start with the crisp, try a two-apple blend, and once you are comfortable, move on to the galette or hand pies. Keep a bag of frozen crisp topping in the freezer through the holidays and you will always have a dessert that takes 15 minutes of work.