How to Build a Gingerbread House That Stays Up (2026 Guide)
A sturdy gingerbread house comes down to stiff dough, stiff royal icing and patient drying. Here is the recipe, template, timeline and decorating ideas.
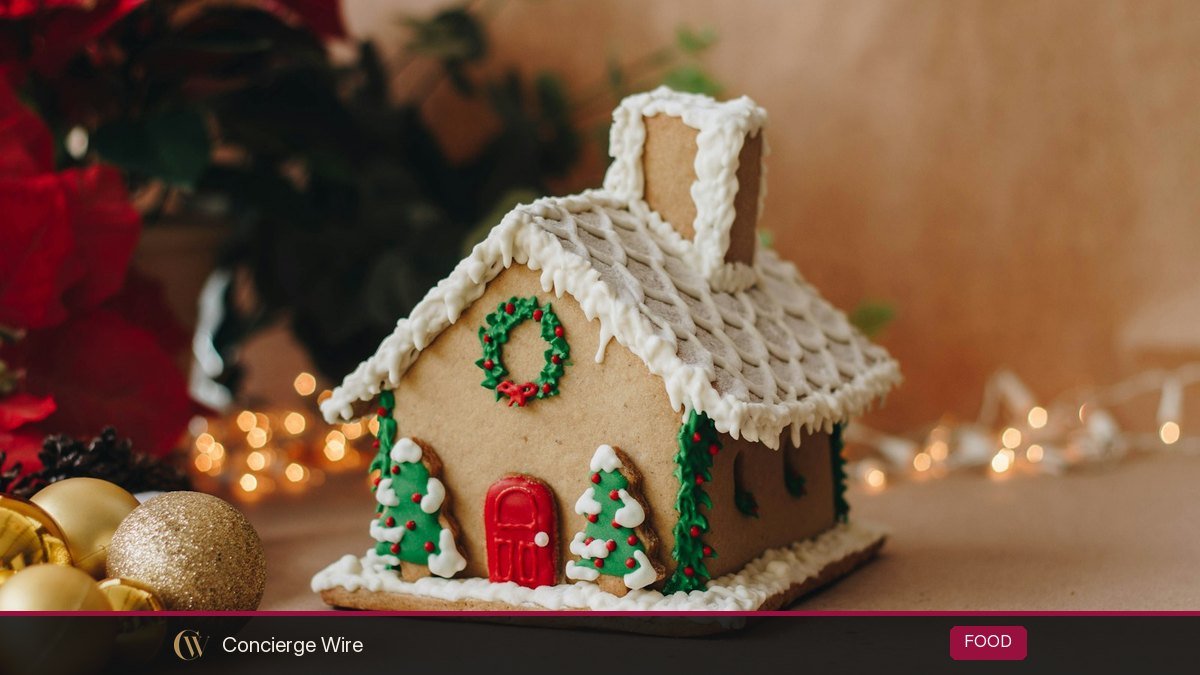
A gingerbread house stays standing when three things go right: the walls are baked from a stiff “construction” dough until fully crisp, the pieces are glued with royal icing thick enough to hold a peak, and the walls dry before the roof goes on. This guide gives you a printable-size template, a royal icing ratio that sets like cement, a kit-versus-scratch comparison, a build-day timeline and 25 decorating ideas, so your house survives until New Year’s. Updated October 2026.
Key Takeaways
- Use a construction dough (more flour, less fat and leavening) rolled at least 1/4 inch thick, not your favorite soft cookie dough.
- Bake low and long, around 325°F, until the pieces are firm, and trim the edges while they are still warm.
- Royal icing made with meringue powder is the glue. It should hold a stiff peak, and it needs a few hours (ideally overnight) to set.
- Build in stages: two walls at a time, let them set, then the roof, then decorations. Rushing the roof is the number one cause of collapse.
- Kits save time and work well for young kids; scratch builds are cheaper per house for groups and let you design any shape.
Gingerbread house quick answer
If you only have a minute, this table covers the decisions that matter most.
| Question | Short answer |
|---|---|
| Best dough | Construction gingerbread: stiff, low-fat, little or no baking soda so it does not puff |
| Thickness | At least 1/4 inch for walls; roofs can be a hair thinner |
| Oven temperature | About 325°F, baked until firm and evenly colored |
| Glue | Royal icing at “stiff peak” consistency |
| Drying time before roof | At least 1 to 2 hours for walls; overnight is safest |
| Drying time before heavy candy | Several hours or overnight after the roof goes on |
| Make-ahead window | Bake pieces up to a week ahead and store flat, airtight |
| Kids under 6 | Use a pre-built kit or build the shell the night before and let them decorate |
Why gingerbread houses fall down
Almost every collapse traces back to one of five problems. Fix these and the rest is decoration.
- Soft dough. Cookie recipes are built to be tender. Tender walls bend. King Arthur Baking’s gingerbread house guide points out that construction dough gets its strength from added flour and egg, and recommends keeping it at least 1/4 inch thick for strong walls.
- Underbaking. Pieces that are still bendy when cool will warp and slump under the roof’s weight. Bake until they are firm and dry right through.
- Thin icing. If the icing droops off a spoon, it will slide off a wall. Glue icing should stand in a stiff peak.
- Humidity. Sugar pulls moisture from the air. A house beside a simmering stove or a humidifier softens over a few days. Build and display it in a dry room.
- Impatience. Putting the roof on wet walls is the classic failure. The walls lean, the roof slides, and the whole thing folds.
Construction gingerbread dough recipe
This is a sturdy, edible-but-firm dough for one medium house (about 6 by 5 inches at the base) with a little left over for trees or people. It is designed to hold its shape, not to be the best cookie you have ever eaten.
Ingredients
- 5 1/2 cups all-purpose flour
- 1 tablespoon ground ginger
- 2 teaspoons ground cinnamon
- 1/2 teaspoon ground cloves
- 1/2 teaspoon salt
- 1/2 cup (1 stick) unsalted butter, softened
- 1 cup packed dark brown sugar
- 1 cup unsulphured molasses
- 2 large eggs
Method
- Whisk the flour, spices and salt in a bowl.
- Beat the butter and brown sugar until smooth, then beat in the molasses and eggs.
- Add the flour mixture in three parts. The dough will be stiff; finish mixing by hand if your mixer strains.
- Divide into two flat disks, wrap and chill for at least an hour so it rolls cleanly.
- Roll directly on lightly floured parchment to 1/4 inch. Rolling on the parchment means you never move a cut piece, which keeps the shapes true.
- Lay your paper templates on top, cut with a sharp knife or pizza wheel, and peel away the scraps around the pieces.
- Slide the parchment onto a baking sheet and bake at 325°F. Small pieces take roughly 12 to 15 minutes; large walls and roof panels often need 18 to 25. Test one piece first, because ovens vary.
- As soon as the pieces come out, lay the template back on and trim any spread edges with a sharp knife while the gingerbread is still warm.
- Cool completely on the sheet. If a piece still bends when cold, return it to a 300°F oven for 5 to 10 minutes to dry out.
There is no baking soda in this version on purpose. Leavening makes the dough puff and spread, and a puffy wall does not meet its neighbor at a clean right angle.
Free template: dimensions for a classic house
Draw these on cardstock or a cereal box, cut them out, and use them as stencils. All measurements are in inches.
| Piece | Quantity | Size | Notes |
|---|---|---|---|
| Side wall | 2 | 6 wide x 4 tall | Simple rectangles; cut a window in one if you like |
| Front and back gable wall | 2 | 5 wide, 4 tall at the edges, 7 tall at the peak | A rectangle with a triangle on top; cut a door in the front |
| Roof panel | 2 | 7 wide x 4 1/2 deep | Gives about 1/2 inch of overhang at each end |
| Chimney (optional) | 4 small pieces | About 1 x 1 1/2 | Cut the bottom edge at an angle to sit on the roof slope |
| Base board | 1 | 10 x 10 or larger | Cake board, cutting board or foil-wrapped cardboard |
To draw the gable wall, mark a 5-inch base, draw 4-inch sides straight up, then join both top corners to a point 7 inches above the center of the base. Check the roof fit on paper first: tape your paper walls together, lay the paper roof on top, and trim the template before you cut any dough. Five minutes with paper saves an hour with gingerbread.
Easy shape variations
- A-frame cabin: skip the side walls. Two big roof panels lean against two triangular end walls. Very stable, great for kids.
- Graham cracker cottage: four graham cracker squares for walls, two for the roof, glued to a milk carton or small box. No baking at all.
- Village of minis: scale every piece down by half and make four or five small houses. Small houses are much harder to topple.
Royal icing that sets like cement
Royal icing is powdered sugar beaten with egg white, which dries rock hard. For a house that people may nibble, use meringue powder (dried egg white sold in the baking aisle) or pasteurized egg whites rather than raw ones. The FDA’s holiday food safety tips recommend pasteurized eggs, including powdered egg whites, for recipes that would otherwise use raw eggs.
Royal icing recipe (glue strength)
- 4 cups (about 1 pound) powdered sugar, sifted
- 3 tablespoons meringue powder
- 5 to 6 tablespoons warm water
- Optional: 1/2 teaspoon clear vanilla or lemon juice for flavor
- Combine the sugar and meringue powder in a grease-free bowl. Any trace of butter or oil stops the icing from setting, so wash the bowl and beaters first.
- Add 5 tablespoons of water and beat on low, then medium, for 5 to 7 minutes until thick, matte-white and glossy at the edges.
- Lift the beater. The peak should stand straight up without curling over. Too stiff to pipe? Add water half a teaspoon at a time. Too soft? Beat in more sugar.
- Cover the bowl with a damp towel or plastic wrap pressed onto the surface at all times. Royal icing crusts within minutes in open air.
Three consistencies, one batch
| Consistency | How to test | Use it for |
|---|---|---|
| Stiff (glue) | Peak stands straight up | Walls, roof, chimney, heavy candy |
| Medium (piping) | Peak bends slightly at the tip | Outlines, icicles, shingles, door trims |
| Flood (thin) | A ribbon drizzled on top disappears in about 10 to 15 seconds | Filling windows, snowy roofs, smooth “snow” on the base |
Make the full batch stiff, then thin small portions in separate bowls with drops of water as you need them. You cannot easily thicken icing once it has gone runny.
Step-by-step assembly
- Decorate flat pieces first. Windows, shutters, piped bricks and sprinkles are far easier on a flat panel. Let them dry for an hour before building.
- Pipe the footprint. Pipe a thick line of stiff icing on the base board where the front wall and one side wall will stand.
- Stand two walls at once. Press the front wall and one side wall into the icing, pipe a fat bead down the corner where they meet, and prop them with cans or jars. Two walls joined at a corner hold each other up.
- Add the other two walls the same way, piping every vertical seam inside and out.
- Wait. Give the four walls at least an hour or two; overnight is better. The seams should be hard to the touch.
- Roof on. Pipe icing along the top edges of all four walls. Set one roof panel, hold it for a minute, then set the other and pipe a line along the ridge. Prop the panels from underneath if they slide.
- Wait again before pressing on heavy candy, so the roof does not shift under the weight.
- Decorate the yard. Spread flood icing on the base for snow, add paths, trees and fences.
Tip: a few canned goods, a ruler and a roll of tape are the best “scaffolding” you own. Prop everything, walk away, and come back later.
Build-day timeline
| When | Task |
|---|---|
| Up to 1 week before | Make templates, bake pieces, store flat in an airtight tin |
| 2 days before | Buy candy, pick a base board, clear a dry spot to display |
| Day before | Make royal icing, decorate flat panels, build the four walls |
| Morning of | Add the roof; let it set while you sort candy into bowls |
| Afternoon | Decorate, add the yard scene, take photos |
Kit vs. from scratch: which is right for you?
| Factor | Store-bought kit | From scratch |
|---|---|---|
| Time | About 1 to 2 hours, plus drying | A baking day plus a building day |
| Typical cost | Often roughly $10 to $30 per kit (prices vary by store and size) | Pantry staples; cheaper per house when you make several |
| Design freedom | Fixed shape | Any shape, size or style |
| Taste | Usually hard and not very tasty | Your own spice mix; still firm but nicer |
| Best for | Young kids, one-off family night, small apartments | Parties, classrooms with prep help, contests, bakers who enjoy the project |
| Common weak point | Thin icing packet that sets slowly | Underbaked or puffy pieces |
A smart middle path: buy a kit, throw out the icing packet, and glue it with your own stiff royal icing. Pre-built kits, where the walls arrive already joined, are the easiest option for toddlers and preschoolers.
25 decorating ideas
Roofs
- Shingles from overlapping sliced almonds, cereal squares or chocolate wafer cookies
- Thick “snow” of flood icing with piped icicles hanging off the eaves
- Rows of candy-coated chocolates in two alternating colors
- Pretzel-stick “log” roof for a cabin look
- Shredded wheat or coconut for a thatched cottage
Walls, windows and doors
- Crushed hard candy melted inside window cut-outs during the last minutes of baking for stained glass
- Piped brick pattern with medium icing
- Pretzel-twist window panes
- A chocolate bar door with a candy-button knob
- Mini candy-cane trim along the corners, which also hides messy seams
Yard and scene
- Ice cream cone trees covered in green star-piped icing
- Rosemary sprigs as real-looking (and good-smelling) evergreens
- A pond made from blue-tinted flood icing or a piece of hard candy
- Gumdrop path to the front door
- Pretzel-stick fence, glued with stiff icing
- Powdered sugar dusted through a sieve for fresh snowfall
- Small gingerbread people building a snowman
Themes
- Your own home, recreated with the right number of windows
- A ski lodge with a cereal-box mountain behind it
- A storefront village for a classroom, one shop per child
- A barn with a candy-corn rooster
- A lighthouse made from stacked round cookies
- A “naked” Scandinavian house with only white piped lines
- A battery tea light inside (never a real candle) so the windows glow
- A neighborhood row of three narrow townhouses in different colors
Making it last and storing it
A display house kept in a dry room, away from steam and direct sun, can look good for weeks. Cover it loosely with a large plastic bag or cake dome overnight if your house is dusty. If you plan to eat it, treat it like any baked good left out at room temperature: eat it within a few days of building, and do not eat pieces that have been handled by many people or sat out for weeks. If someone in the house has food allergies, check every candy label, since the house will contain wheat and egg at minimum.
Want to save a showpiece? Some families keep the template and photos each year rather than the house itself. The paper template becomes part of the tradition.
Frequently Asked Questions
How long should royal icing dry before adding the roof?
At least an hour or two for the walls, until the seams are hard to the touch. Overnight is the safest choice, especially in humid weather. King Arthur Baking notes drying can take anywhere from a few hours to overnight.
Can I use regular frosting instead of royal icing?
Not for the structure. Buttercream and canned frosting stay soft, so the walls will slide. You can use them for decorations on a fully set house, but glue every piece with royal icing.
How thick should gingerbread house pieces be?
About 1/4 inch for walls. Thinner pieces bake faster but bend and break more easily; much thicker pieces are heavy and take a long time to dry through.
Can I bake the pieces ahead of time?
Yes. Fully baked and cooled pieces keep for about a week stacked flat between parchment in an airtight container. If they soften, dry them for a few minutes in a low oven before building.
Is it safe to eat a gingerbread house?
It can be if it is made with meringue powder or pasteurized egg whites and eaten within a few days. Houses left out on display for weeks get dusty and stale, so treat those as decorations.
What is the easiest gingerbread house for small children?
A pre-assembled kit or a graham cracker house glued around a small milk carton. Build the shell the night before so little ones only do the fun part: candy.
Your weekend plan
Pick your shape, draw the template on cardstock this week, and bake the pieces a few days ahead. Build the walls the night before, add the roof in the morning, and save the candy for when everyone is gathered. Stiff dough, stiff icing and patient drying are the whole secret.